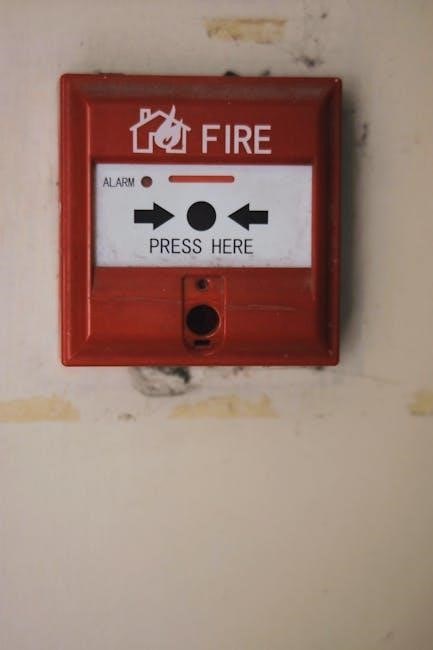
The Viper Alarm System is a state-of-the-art vehicle security solution designed to protect your car with advanced features like remote start and immobilization technology. Directed Electronics‚ the company behind Viper‚ has been a leader in car security since 1985‚ offering cutting-edge products. The system includes key features such as shock sensors‚ door and hood sensors‚ and multi-level security arming. To ensure optimal performance‚ it’s crucial to read the owner’s manual‚ which provides detailed instructions for installation‚ operation‚ and troubleshooting. Regular updates and proper maintenance are recommended to keep your system functioning at its best. With Viper‚ you can enjoy peace of mind knowing your vehicle is secure and conveniently controlled.
Overview of the Viper Alarm System
The Viper Alarm System is a comprehensive vehicle security solution designed to protect your car from theft and unauthorized access. It combines advanced features like remote start‚ shock sensors‚ and multi-level arming to ensure maximum protection. The system includes a control module‚ remote control‚ and various sensors that work together to detect and deter potential threats. With its user-friendly interface and customizable settings‚ Viper offers a seamless experience for car owners. The system is supported by detailed owner’s manuals and installation guides‚ ensuring proper setup and operation. Regular updates and maintenance are recommended to keep the system functioning optimally and securely.
Importance of Reading the Owner’s Manual
Reading the owner’s manual is essential for understanding and utilizing your Viper Alarm System effectively. The manual provides detailed instructions on installation‚ operation‚ and troubleshooting‚ ensuring proper setup and functionality. It explains key features‚ security modes‚ and maintenance tips to maximize your system’s performance. Without the manual‚ you may miss critical information‚ leading to suboptimal use or system errors. Directed Electronics emphasizes that proper manual reading helps prevent installation mistakes and ensures all safety measures are followed. Regularly reviewing the manual keeps you informed about updates and best practices for your Viper system.
Key Features of the Viper Alarm System
The Viper Alarm System offers advanced security and convenience features‚ including remote start‚ shock sensors‚ and door/hood sensors. Its multi-level arming provides customizable protection‚ while the built-in door contact facility enhances triggering accuracy. The system also features immobilization technology to prevent unauthorized vehicle startup. With its user-friendly interface and reliable performance‚ Viper ensures your car is secure and easily controlled. These features make it a top choice for vehicle protection‚ combining cutting-edge technology with ease of use for optimal safety and convenience.
Understanding the Components of the Viper Alarm
The Viper Alarm System consists of a remote control‚ sensors‚ a control module‚ and wiring. These components work together to provide advanced security and functionality for your vehicle.
Remote Control and Its Functions
The Viper Alarm System comes with a remote control that offers convenient functionality. It allows you to arm and disarm the system‚ activate the remote start feature‚ and trigger the panic mode. The remote typically includes buttons for locking‚ unlocking‚ and starting the vehicle. Some models feature a 2-way remote‚ which provides confirmation feedback through LED indicators or vibration. The remote control is essential for operating the system efficiently and ensures that you can secure or access your vehicle from a distance. Proper use of the remote is detailed in the owner’s manual to maximize its functionality and performance.
Sensors and Their Roles in the Alarm System
The Viper Alarm System relies on a network of sensors to detect potential threats. Door and hood sensors monitor unauthorized access‚ triggering the alarm if opened improperly. Shock sensors detect impacts or vibrations‚ providing an additional layer of security. These sensors work in tandem to ensure comprehensive protection; Proper installation and configuration‚ as outlined in the owner’s manual‚ are crucial for optimal performance. Regular checks ensure sensors remain sensitive and reliable‚ safeguarding your vehicle against theft and vandalism effectively.
The Brain of the System: The Control Module
The control module is the central command center of the Viper Alarm System‚ processing signals from sensors and remote commands. It interprets data to determine appropriate responses‚ such as triggering the siren or alerting the remote. The module is pre-programmed with advanced logic to ensure reliable operation; Proper installation‚ as detailed in the manual‚ is essential for functionality. Regular software updates‚ available for download‚ enhance performance and security. The control module’s efficiency ensures your vehicle remains protected with cutting-edge technology and seamless integration of all system components.
Wiring and Connectors: Essential Components
Proper wiring and connectors are critical for the Viper Alarm System’s functionality. Correct connections ensure seamless communication between components like sensors‚ the control module‚ and the vehicle’s electrical system. Improper wiring can lead to system malfunctions or electrical damage. The owner’s manual provides detailed diagrams and step-by-step instructions for wiring configurations‚ emphasizing the importance of using high-quality connectors to prevent signal interference. Professional installation is often recommended to avoid common mistakes. Regularly inspecting wiring and connections ensures long-term reliability and optimal performance of your Viper Alarm System.

Installation Guide for the Viper Alarm System
Professional installation is highly recommended for the Viper Alarm System to ensure proper functionality. Follow the step-by-step guide in the owner’s manual carefully‚ starting with a pre-installation checklist to verify compatibility and prepare components. Correctly connect wiring and sensors to the control module and vehicle’s electrical system. Adhere strictly to the manual’s instructions to avoid common mistakes and ensure reliable performance. Proper installation is key to maximizing your system’s security and remote start features effectively.
Pre-Installation Checklist
Before installing your Viper Alarm System‚ ensure you have the correct tools and materials. Verify vehicle compatibility with your Viper model using the owner’s manual. Gather all components‚ including the control module‚ sensors‚ wiring harness‚ and remotes. Review the wiring diagram to understand connections. Test all sensors and remotes to ensure functionality. Charge the remote batteries and program additional remotes if needed. Familiarize yourself with the installation steps and safety precautions outlined in the manual. Double-check local regulations for alarm system compliance. If unsure‚ consider professional installation to avoid errors. Proper preparation ensures a smooth and successful installation process.
Step-by-Step Installation Instructions
Begin by mounting the control module in a secure‚ dry location‚ ensuring accessibility for future adjustments. Connect the wiring harness to the vehicle’s electrical system‚ following the diagram in the manual. Install sensors‚ such as door and shock sensors‚ in their designated locations. Route wires neatly and securely to avoid damage. Connect the remote start and alarm triggers according to the specified terminals. Test each component individually to ensure proper functionality. Finally‚ program the remote controls by following the manual’s instructions. Once all connections are verified‚ perform a full system test to ensure everything operates correctly.
Common Installation Mistakes to Avoid
Avoid improper wiring connections‚ as this can cause system malfunctions or electrical issues. Ensure all sensors are installed correctly and aligned properly for optimal detection. Neglecting to follow the manual’s step-by-step instructions can lead to faulty setup. Failing to test each component after installation may result in undetected issues. Do not mix up positive and negative wires‚ as this can damage the system or vehicle electronics. Inadequate wire routing and securing can lead to wear and tear. Lastly‚ not programming the remote control correctly after installation can prevent proper system operation.
Connecting the Alarm to Your Vehicle’s Electrical System
Connecting the Viper Alarm to your vehicle’s electrical system requires careful attention to detail. Start by locating the vehicle’s battery and ensuring it is disconnected to avoid electrical shocks. Connect the positive (red) and negative (black) wires from the alarm system to the corresponding terminals on the battery. Properly integrate the system with your vehicle’s wiring harness‚ ensuring all connections are secure and insulated. Avoid short circuits by double-checking all wire connections. Once installed‚ reconnect the battery and test the system to ensure proper functionality. Incorrect wiring can lead to electrical issues or system malfunctions‚ so professional installation is highly recommended if unsure.
Using the Remote Start Feature
The Viper Remote Start feature allows you to start your vehicle from a distance‚ providing convenience in extreme weather conditions. Programming and activation are straightforward‚ ensuring seamless operation. Always test the system post-installation for proper functionality and refer to the manual for troubleshooting tips to ensure optimal performance and safety.
How to Program the Remote Start Function
Programming the remote start function on your Viper system involves a few simple steps. First‚ insert the key into the ignition and press the unlock button on the remote. Next‚ hold the remote start button until the vehicle’s parking lights flash. Cycle the ignition to the “ON” position and back to “OFF” to complete the programming process. The system will confirm successful programming by flashing the lights again. Ensure the vehicle starts and runs for the preset time. Refer to your owner’s manual for specific instructions‚ as procedures may vary slightly depending on your model.
Activating and Deactivating the Remote Start
To activate the remote start‚ press the unlock button on your Viper remote‚ followed by holding the remote start button until the vehicle’s parking lights flash. The engine will then start‚ and the lights will remain on. To deactivate‚ press and hold the remote start button again until the lights stop flashing. If your vehicle is equipped with a two-way remote‚ you’ll receive confirmation signals. Always ensure the vehicle is in a well-ventilated area when using remote start. For deactivation‚ simply press the lock button or start the engine normally. Refer to your owner’s manual for model-specific instructions.
Troubleshooting Remote Start Issues
- If the remote start fails‚ check the battery level in your remote control and ensure it’s functioning properly.
- Verify that the vehicle is in a location with adequate signal strength and no obstructions blocking the signal.
- Review the system error codes displayed on your remote or dashboard to identify specific issues.
- Ensure the installation was performed correctly by a professional‚ as improper wiring can cause malfunctions.
- If issues persist‚ consult the owner’s manual or contact a certified technician for assistance.
- Test the remote start function in a different location to rule out environmental interference.
Best Practices for Using the Remote Start
- Always ensure your vehicle is in a well-ventilated area when using remote start to avoid carbon monoxide buildup.
- Check that the vehicle is locked and all doors and windows are closed before activating remote start.
- Ensure the remote start system is professionally installed to avoid malfunctions.
- Keep the remote control away from extreme temperatures and moisture to maintain functionality.
- Never leave the key fob inside the vehicle while using remote start.
- Test the remote start feature periodically to ensure proper operation.
- Use the remote start responsibly‚ avoiding activation in enclosed spaces like garages or apartments.
- Update the system’s software regularly to benefit from the latest features and improvements.
Security Features of the Viper Alarm System
The Viper Alarm System offers advanced security features including multi-level arming‚ shock sensors‚ door and hood sensors‚ and immobilization technology to protect your vehicle effectively.
Arming and Disarming the System
Arming and disarming the Viper Alarm System is a straightforward process using the remote control or key fob. The system features multi-level security arming‚ allowing you to customize protection levels. When armed‚ sensors monitor for unauthorized access‚ and the immobilizer prevents engine start. Disarming deactivates these features‚ granting full vehicle access. The remote control provides convenience‚ while optional smart app integration offers additional control. Ensure proper arming and disarming procedures are followed‚ as outlined in the owner’s manual‚ to maintain optimal security and avoid false alarms. Regular checks of sensors and remote functionality are recommended for reliable operation.
Understanding the Different Security Modes
The Viper Alarm System offers multiple security modes to tailor protection to your needs. The default “armed” mode activates all sensors and immobilizes the vehicle‚ while “passive” mode delays certain features for convenience. A “valet” mode temporarily disables key security features‚ ideal for service visits. Multi-level arming allows customization‚ such as enabling door sensors but not the shock sensor. The system also includes a “warn-away” feature‚ chirping the siren and flashing lights to deter potential threats without fully alarming. These modes enhance flexibility and ensure your vehicle’s security adapts to various situations‚ providing peace of mind with every use.
Door and Hood Sensors: How They Work
Viper’s door and hood sensors are integral to the alarm system‚ providing an additional layer of security. These sensors monitor the vehicle’s doors and hood‚ triggering the alarm if they detect unauthorized access. When a door or hood is opened‚ the sensor sends a signal to the control module‚ which activates the siren and flashing lights. Proper installation ensures these sensors function correctly‚ offering reliable protection against theft or tampering. The system’s sensitivity can be adjusted to minimize false alarms‚ ensuring peace of mind while safeguarding your vehicle effectively.
Shock Sensor: Detecting Unauthorized Access
The Viper Alarm System features a shock sensor designed to detect unauthorized access by monitoring vibrations or impacts on the vehicle. This sensor triggers the alarm if it detects suspicious activity‚ such as someone attempting to break into the car. The system includes two sensitivity modes: Warn-Away and Full Alarm. In Warn-Away mode‚ the siren chirps and lights flash to deter potential intruders without fully activating the alarm. If the impact is more severe‚ the Full Alarm mode engages‚ ensuring maximum protection. This feature enhances security by providing an immediate response to potential threats‚ offering peace of mind for vehicle owners.
Troubleshooting Common Issues
Troubleshooting the Viper Alarm involves addressing false alarms‚ remote malfunctions‚ and sensor issues. Check sensor settings‚ wiring connections‚ and system error codes in the manual for solutions.
Why Your Alarm Might Be Triggering False Alarms
Your Viper Alarm might trigger false alarms due to sensitivity settings‚ environmental factors‚ or faulty wiring. Shock sensors may activate from vibrations or bumps‚ while door and hood sensors could trigger from slight movements. Ensure all sensors are properly calibrated and adjust sensitivity levels as needed. Check wiring connections for damage or interference. Environmental factors like extreme weather or nearby radio frequencies can also cause false triggers. Review the owner’s manual for troubleshooting steps or error codes that may indicate specific issues. Regular maintenance and system updates can help minimize false alarms and optimize performance. Always consult the manual for detailed guidance.
Resolving Issues with the Remote Control
If your Viper remote control isn’t functioning properly‚ start by checking the battery. Weak or dead batteries are a common cause of issues. Replace them with fresh ones‚ ensuring correct polarity. Next‚ check for physical obstructions or electronic interference that may block the signal. If the problem persists‚ re-sync the remote with the system by following the programming instructions in the owner’s manual. For advanced issues‚ consult the troubleshooting section or contact a professional installer. Regularly cleaning the remote and ensuring proper alignment with the system can also resolve connectivity problems. Always refer to the manual for specific guidance tailored to your model.
Fixing Sensor Malfunctions
Sensor malfunctions in your Viper alarm system can often be resolved by checking alignment‚ cleaning‚ or adjusting sensitivity. Ensure door‚ hood‚ and shock sensors are free from dirt or debris. Verify wiring connections are secure and not damaged. If issues persist‚ restart the system or consult the owner’s manual for recalibration steps. For advanced problems‚ such as false triggers‚ adjust sensor sensitivity settings or update system software. If troubleshooting fails‚ contact a professional installer for assistance. Regular maintenance and proper installation are key to preventing sensor-related issues. Always refer to the manual for specific guidance tailored to your Viper model.
System Error Codes and Their Meanings
The Viper alarm system uses specific error codes to indicate issues‚ helping diagnose problems efficiently. Codes like “E1” or “E2” may signal sensor malfunctions or wiring faults. Refer to the owner’s manual for a detailed list of codes and their meanings. For example‚ a “Shock Sensor Error” might trigger code “S1‚” indicating misalignment or damage. Resetting the system or consulting the troubleshooting guide often resolves these issues. If errors persist‚ updating the system software or contacting a professional installer may be necessary. Understanding these codes ensures timely resolution and optimal system performance. Always consult the manual for accurate interpretations tailored to your Viper model.

Maintenance and Care of Your Viper Alarm
Regularly clean the remote and sensors to ensure optimal performance. Update the system software periodically for enhanced security features. Check wiring connections and replace batteries as needed to maintain reliability and functionality.
Regular Checks to Ensure Optimal Performance
To maintain your Viper Alarm System’s efficiency‚ perform regular checks. Clean the remote control and sensors to prevent dirt or debris interference. Inspect wiring connections for damage or corrosion‚ ensuring all components are securely linked. Test the remote start and alarm functions periodically to confirm proper operation. Check sensor sensitivity and adjust settings if necessary. Replace remote batteries when low to avoid signal issues. Regularly update the system software to access the latest features and security enhancements. These checks ensure your Viper Alarm operates reliably and provides maximum protection for your vehicle.
Updating Your System’s Software
Regular software updates are essential for maintaining your Viper Alarm System’s performance and security. Check for updates on the official Viper website or through authorized dealers. Download the latest firmware using a compatible device and follow the instructions provided in the owner’s manual. Ensure the system is properly connected to a power source during the update process to avoid interruptions. Some updates may require professional installation‚ especially for advanced features. Keeping your software up-to-date ensures you have access to the latest features‚ security patches‚ and compatibility improvements. Never install unauthorized software to prevent system malfunctions or vulnerabilities.
Cleaning and Protecting the Remote Control
Regularly clean and protect your Viper remote control to maintain its functionality and longevity. Use a soft‚ dry cloth to wipe away dirt or debris from the surface. For stubborn stains‚ dampen the cloth with mild soap and water‚ but avoid harsh chemicals or abrasive materials. Never submerge the remote in water or expose it to direct sunlight for extended periods. Store the remote in a protective case or keychain when not in use to prevent scratches or damage. Ensure buttons remain responsive by cleaning between them gently. Regular maintenance ensures reliable performance and extends the life of your remote control;
Battery Maintenance for the Remote
Proper battery maintenance is essential for your Viper remote control to function reliably. Check the remote’s battery level regularly‚ as low power can cause inconsistent performance. Replace batteries with the correct type specified in the owner’s manual to ensure optimal operation. Avoid mixing old and new batteries‚ as this can reduce efficiency. If batteries leak‚ clean the compartment with a soft cloth and mild detergent before installing new ones. Store spare batteries in a cool‚ dry place to preserve their lifespan. Regularly testing the remote’s functionality after battery replacement ensures your system remains secure and responsive.

Programmable Features of the Viper Alarm
The Viper Alarm offers customizable settings‚ allowing users to tailor features like multi-vehicle operation‚ sensor sensitivity‚ and remote controls to their preferences for enhanced functionality and convenience.
Customizing Your Alarm Settings
Customizing your Viper Alarm settings allows you to tailor the system to your specific needs. Users can adjust features like sensor sensitivity‚ arming delays‚ and multi-vehicle operation. The system also supports programmable options such as remote start duration and automatic re-lock timing. By accessing the control module‚ you can personalize settings like shock sensor thresholds and door unlock sequences. Additional customization includes assigning unique functions to remote buttons and setting up silent arming/disarming modes. These programmable features enhance convenience and security‚ ensuring your Viper Alarm operates exactly how you prefer. Refer to the owner’s manual for detailed instructions on adjusting these settings.
Programming Additional Remotes
Programming additional remotes for your Viper Alarm System is a straightforward process. Start by entering programming mode‚ typically done by pressing a specific sequence of buttons on your existing remote or control module. Once in programming mode‚ synchronize the new remote by pressing the designated button‚ usually found on the remote or in the owner’s manual. Ensure each remote is programmed individually to maintain functionality. The system supports multiple remotes‚ allowing shared access or backup options. After programming‚ test the remote to confirm proper operation. Refer to the manual for detailed steps and troubleshooting tips to ensure successful remote integration.
Setting Up Multi-Vehicle Operation
Setting up multi-vehicle operation with your Viper Alarm System allows you to control multiple vehicles from a single remote. Begin by ensuring each vehicle’s system is compatible and properly installed. Sync each vehicle’s unique identifier to the remote by following the programming sequence outlined in the owner’s manual. This typically involves entering a specific code or pressing a series of buttons. Once synced‚ test the remote to ensure it works seamlessly with all vehicles. This feature is ideal for owners with multiple cars‚ offering convenience and streamlined control. Always refer to the manual for detailed instructions to avoid conflicts or errors during setup.
Adjusting Sensor Sensitivity
Adjusting sensor sensitivity on your Viper Alarm System ensures optimal performance and reduces false alarms. Begin by accessing the system’s settings via the remote control or control module. Use the sensitivity adjustment feature to fine-tune sensors like shock‚ door‚ and hood sensors. Each sensor may require individual calibration to match your vehicle’s specific needs. Test the system after adjustments to ensure proper detection. If issues persist‚ refer to the owner’s manual for detailed calibration instructions. Proper sensitivity adjustment ensures your alarm responds accurately to potential threats while minimizing unwanted triggers.
Thank you for choosing the Viper Alarm System for your vehicle’s security. Proper installation‚ regular maintenance‚ and following the owner’s manual ensure optimal performance and peace of mind.
Final Tips for Getting the Most Out of Your Viper Alarm
To maximize your Viper Alarm’s performance‚ always follow the owner’s manual guidelines. Regularly check sensors and wiring for optimal functionality. Update your system’s software periodically to access the latest features and security enhancements. For complex installations or troubleshooting‚ consider consulting a professional installer. Keep your remote control clean and ensure its battery is well-maintained. Familiarize yourself with all security modes and features to tailor the system to your needs. By adhering to these tips‚ you’ll enjoy enhanced vehicle security‚ convenience‚ and peace of mind for years to come.
Staying Updated with the Latest Features
Keeping your Viper Alarm system updated ensures you benefit from the latest advancements in security and functionality. Regular software updates often include new features‚ performance improvements‚ and enhanced security measures. Visit the official Directed Electronics website or authorized dealers to download the newest firmware. Some models‚ like the Viper 5806V‚ offer downloadable updates to improve remote start and alarm capabilities. Updating not only boosts system reliability but also ensures compatibility with emerging technologies. Stay informed about updates through newsletters or support channels to keep your Viper system at peak performance and security levels.