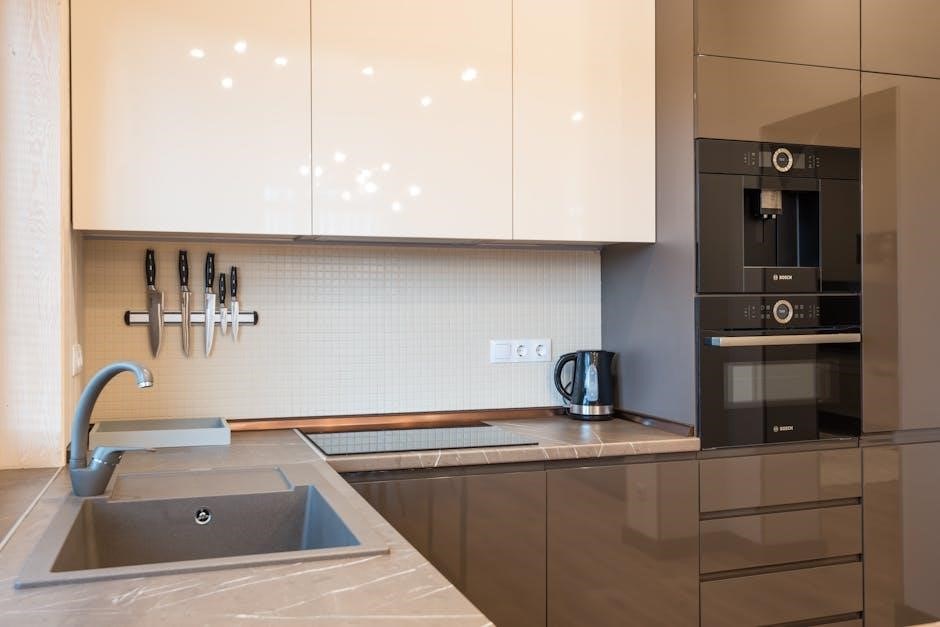
General Electric (GE) stoves offer a convenient self-cleaning feature that simplifies oven maintenance. This high-heat process decomposes food residue into ash‚ eliminating harsh chemicals. Follow guidelines for safety and efficiency‚ ensuring proper preparation and ventilation. This guide provides step-by-step instructions to optimize your self-cleaning experience.
Overview of the Self-Cleaning Feature
The self-cleaning feature on General Electric stoves is a time-saving solution for maintaining your oven’s cleanliness. By utilizing high heat‚ the oven reaches temperatures of up to 880°F (471°C)‚ decomposing food residue into ash. This eliminates the need for harsh chemicals or intensive scrubbing. The process is designed to be efficient‚ with cycles lasting between 2 to 4 hours‚ depending on soil level. Additionally‚ some models offer a steam clean option for lighter messes‚ requiring only water and a shorter cycle. Fans in the oven help cool internal components during and after cleaning. Safety features‚ such as automatic door locking‚ ensure the process is secure. Proper preparation‚ like removing racks and utensils‚ is essential for optimal results. This feature makes cleaning convenient while maintaining oven performance and hygiene.
Importance of Following Manufacturer Guidelines
Adhering to GE’s self-cleaning instructions is crucial for safety and effectiveness. Deviating from guidelines can lead to malfunctions or damage. For instance‚ leaving racks or utensils inside may cause warping under high heat. Ignoring ventilation recommendations can result in harmful fumes. Additionally‚ failing to turn off burners before starting the cycle might pose a fire hazard. Proper preparation‚ such as removing food debris and ensuring the oven is empty‚ ensures the cycle runs smoothly. Following temperature settings and timing prevents overheating‚ which could trigger the thermal fuse. GE’s guidelines are tailored to your model‚ so consulting the manual is essential for optimal performance and longevity of your appliance. Neglecting these steps can void warranties or require costly repairs. Safety and efficiency are paramount‚ making adherence to instructions non-negotiable.

Preparation for Self-Cleaning Cycle
Preparation is key for a successful self-cleaning cycle. Remove racks‚ accessories‚ and food residue. Clean the exterior and ensure the kitchen is well-ventilated. Safety first always.
Removing Oven Racks and Accessories
Before initiating the self-cleaning cycle‚ remove all oven racks‚ pans‚ and utensils. These items can warp or discolor due to extreme heat. Clean racks separately with mild detergent to avoid damage. Shiny metal racks should be removed to prevent discoloration. Ensure the oven is empty except for the oven floor‚ which may have a protective liner. Failure to remove accessories can lead to damage or create harmful fumes during the cycle. Always refer to your GE oven manual for specific instructions regarding rack removal and safe handling. Proper preparation ensures a safe and effective cleaning process. This step is crucial for both functionality and safety.
Cleaning the Oven Exterior Before the Cycle
Cleaning the oven exterior before starting the self-cleaning cycle is essential for maintaining your GE stove’s appearance and functionality. Use a soft‚ damp cloth and mild detergent to wipe down the exterior surfaces‚ including the door‚ handle‚ and control panel. Avoid using abrasive cleaners or scrubbers‚ as they may scratch the finish. Remove any visible spills or splatters to prevent them from hardening during the cycle. Do not clean the oven window or vents at this stage‚ as they will be addressed after the self-cleaning process. Ensure the exterior is dry before initiating the cycle to avoid water spots. This step ensures a clean and polished look for your stove while preparing it for the high-heat cleaning process.
Protecting the Kitchen from Heat and Odors
Protecting your kitchen from heat and odors during the self-cleaning cycle is crucial for a comfortable and safe experience. Ensure proper ventilation by opening windows and turning on exhaust fans to reduce fumes. Remove any strong-smelling foods from the vicinity to minimize odor spread. Use the range hood on high speed to circulate air effectively. If possible‚ seal the kitchen area temporarily to contain heat and odors. Consider using an air purifier to further neutralize smells. Always follow safety guidelines to prevent overheating or fire hazards. By taking these steps‚ you can protect your kitchen environment while the self-cleaning cycle runs efficiently. This preparation ensures a safer and more pleasant cleaning process for your GE stove.
Ensuring Safety Before Starting the Cycle
Ensuring safety before starting the self-cleaning cycle is essential to prevent accidents and damage. Remove all oven racks‚ cookware‚ and flammable items from the kitchen. Turn off the surface burners and ensure the oven is empty. Keep children and pets away from the stove during the cycle. Proper ventilation is crucial‚ so open windows and use the range hood to reduce fumes. Avoid using abrasive cleaners or water inside the oven before the cycle starts. The high heat generated during self-cleaning can cause burns or fire hazards if precautions are not taken. Always refer to the manufacturer’s guidelines for specific safety recommendations. Failure to follow safety measures may result in damage to the oven or potential fire risks. This step ensures a safe and efficient cleaning process for your GE stove.

Understanding the Self-Cleaning Process
The self-cleaning process uses high heat to decompose food residue into ash‚ eliminating the need for harsh chemicals. This efficient method simplifies oven maintenance and ensures a thorough clean.
How High Heat Decomposes Food Residue
During the self-cleaning cycle‚ the oven reaches extremely high temperatures‚ up to 880°F (471°C). These intense heat levels effectively decompose food residue‚ turning it into a manageable ash. This process eliminates the need for abrasive cleaners‚ making maintenance easier. The high heat breaks down tough grease and food particles‚ ensuring a deep clean without manual scrubbing. Proper ventilation is essential to handle the fumes produced during this cycle. After completion‚ the ash can be wiped away‚ leaving the oven interior clean and ready for use. This method is both efficient and safe when followed according to manufacturer guidelines.
Duration of the Self-Cleaning Cycle
The self-cleaning cycle on a General Electric stove typically lasts between 2 to 4 hours‚ depending on the level of soil and the model of your oven. The cycle duration is pre-set and cannot be adjusted once started. During this time‚ the oven door locks to ensure safety as it reaches high temperatures. After the cycle completes‚ the oven requires additional time to cool down‚ which can take another 30 to 90 minutes. It’s important to allow the oven to cool completely before wiping away ash and residue. For lighter cleaning needs‚ GE offers a steam clean option‚ which lasts about 30 minutes and is ideal for minor spills. Always refer to your specific model’s manual for exact timing and instructions.
Temperature Levels During the Cycle
During the self-cleaning cycle‚ General Electric stoves reach extremely high temperatures‚ typically up to 880 degrees Fahrenheit (471°C)‚ to decompose food residue into ash. The exact temperature may vary depending on the model and the level of cleaning required. These high heat levels are essential for effectively breaking down tough‚ baked-on food soils. The oven door locks during the cycle to ensure safety‚ as the heat generated is intense enough to cause burns. After the cycle completes‚ the oven will remain hot for a period‚ requiring time to cool down before any further cleaning or use. Always refer to your specific model’s manual for precise temperature details and guidelines.
The Role of Fans in Cooling the Oven
During and after the self-cleaning cycle‚ General Electric stoves utilize fans to facilitate cooling. These fans help lower the internal temperature by circulating air‚ ensuring components remain within safe operational limits. The fan may continue running for an extended period after the cycle ends‚ aiding in the gradual cooling of the oven. This cooling process typically takes between 30 to 90 minutes‚ depending on the model and intensity of the cycle. The fan’s operation is automatic‚ and its prolonged runtime is normal‚ as it prevents overheating and ensures the oven returns to a safe temperature for handling or further use. Always allow the oven to cool completely before wiping down or restarting it. Refer to your specific model’s manual for detailed insights into fan operation and cooling timelines.
Operating the Self-Cleaning Feature
Activate the self-cleaning mode by setting the temperature knob to “Clean” and adjusting the timer as needed. For minor spills‚ use the Steam Clean option by adding water and selecting the feature. Ensure racks are removed and surfaces are prepared before starting. Monitor the cycle through the oven window‚ and let it complete without interruption. After the cycle‚ allow the oven to cool before wiping away ash. Always follow the manufacturer’s instructions for safe and effective cleaning.
Step-by-Step Activation of the Self-Clean Mode
- Ensure all surface burners are turned off before initiating the self-cleaning cycle.
- Remove oven racks‚ liners‚ and any large food debris to prevent damage during high heat.
- Locate the temperature knob and turn it to the “Clean” position‚ ensuring the timer is set according to the desired cycle duration.
- For models with a latch release button‚ press and hold it while sliding the oven latch to secure the door.
- Once activated‚ the oven will lock automatically and begin heating to decompose food residue.
- Monitor the process through the oven window‚ avoiding any interruptions during the cycle.
Always refer to your GE oven’s manual for model-specific instructions‚ as settings may vary.
Using the Steam Clean Option for Minor Spills
The Steam Clean option offers a quicker and gentler alternative to the full self-cleaning cycle‚ ideal for minor spills and light soil. To activate:
- Pour one cup of water into the bottom of a cool oven.
- Close the oven door and select the Steam Clean function on the control panel.
- The cycle lasts approximately 30 minutes‚ loosening food residue at lower temperatures than the standard self-clean mode.
- Avoid using this feature for heavy grime‚ as it requires a full self-cleaning cycle for effective removal.
- After the cycle‚ wipe down the interior with a damp cloth to remove loosened debris.
This method maintains your oven’s cleanliness without extreme heat‚ making it a convenient solution for regular maintenance.
Setting the Timer and Temperature Knobs
Setting the timer and temperature knobs is a crucial step in activating the self-cleaning cycle on your GE stove. For models with mechanical controls:
- Turn the oven temperature knob clockwise to the “Clean” position.
- If the temperature knob does not have a “Clean” position‚ select any temperature setting.
- Use the timer knob to set the desired cleaning duration‚ typically between 2 to 4 hours‚ depending on soil level.
- Ensure the knobs are securely in place to start the cycle.
- Once set‚ the oven will begin the high-heat cleaning process.
- After the cycle completes‚ the timer will signal‚ and the oven will shut off automatically.
Always refer to your specific model’s manual for precise instructions‚ as settings may vary.
Monitoring the Cleaning Process
Monitoring the self-cleaning process is essential to ensure safety and efficiency. Once the cycle starts‚ stay nearby to observe the process. You may hear strange noises or see flashes of light due to food residue burning off. The oven will emit intense heat and strong odors‚ so proper ventilation is crucial. Avoid opening the oven door during the cycle‚ as it can release harmful fumes and reduce cleaning effectiveness. Use the oven window to check progress without interrupting the cycle. After the cycle completes‚ let the oven cool before handling any parts. If issues arise‚ such as a malfunctioning timer or unusual smells‚ turn off the oven and consult the manual or a technician. Always prioritize safety and follow manufacturer guidelines for best results.
Post-Cleaning Procedures
After the self-cleaning cycle‚ allow the oven to cool completely. Wipe away ash with a damp cloth and clean the oven door thoroughly.
Allowing the Oven to Cool Down Completely
After the self-cleaning cycle‚ it is essential to let the oven cool down entirely before proceeding with any further cleaning. This step ensures your safety and prevents burns‚ as the oven interior and surfaces will remain extremely hot for a significant period. The cooling process typically takes between 30 to 90 minutes‚ depending on the oven’s temperature during the cycle. During this time‚ avoid opening the oven door or touching any internal components. Once the oven has cooled‚ you can safely remove ash and residue. Always use oven mitts or tongs to handle racks or other accessories‚ even after cooling‚ as they may still retain heat. Proper cooling is crucial for both safety and effective cleaning results.
Wiping Away Ash and Residue
After the self-cleaning cycle and once the oven has cooled completely‚ use a damp cloth or sponge to wipe away the ash and residue. Avoid using abrasive scrubbers or harsh chemicals‚ as they can damage the oven’s interior surfaces. For tougher residue‚ a soft scouring pad may be used gently. Moisten the cloth with water to prevent ash from becoming airborne‚ which can spread dust. Wipe all interior surfaces‚ including the walls‚ floor‚ and racks‚ until clean. For particularly stubborn spots‚ a small amount of mild detergent can be applied to the cloth. After wiping‚ use a dry cloth to remove excess moisture. Properly dispose of the ash and residue‚ and rinse any cleaning tools thoroughly. This step ensures a clean and safe oven for future use.
Cleaning the Oven Door and Window
After the self-cleaning cycle‚ allow the oven to cool completely before cleaning the door and window. Use a soft‚ damp cloth with a mild detergent to wipe away any residue or streaks. For tougher spots‚ a gentle glass cleaner can be applied‚ but avoid using abrasive scrubbers or harsh chemicals‚ as they may scratch the surfaces. If minor spills are present‚ the steam clean option can be used to loosen debris before wiping. Once clean‚ dry the door and window with a soft cloth to prevent water spots. Regular cleaning of the oven door and window ensures visibility and maintains the appearance of your GE stove. Always avoid using high-pressure hoses or sharp objects that could damage the glass or frames.
Safety Precautions and Warnings
Always wear oven mitts or gloves when handling hot surfaces. Keep children away during the self-cleaning cycle. Ensure proper ventilation to avoid fumes. Never use harsh chemicals or abrasive cleaners‚ as they can damage surfaces. Avoid touching the oven door or window during and after cleaning‚ as extreme heat can cause burns. Regularly inspect oven parts for wear and tear. Follow all manufacturer guidelines to ensure safe operation and maintain your GE stove’s performance and longevity.
Preventing Burns During and After Cleaning
Preventing burns is crucial when using the self-cleaning feature on your GE stove. The oven reaches extremely high temperatures‚ up to 880°F‚ during the cycle. Always wear oven mitts or heat-resistant gloves when handling racks or accessories. Keep children and pets away from the oven during and after cleaning‚ as the exterior surfaces can remain hot for hours. Avoid touching the oven door‚ window‚ or interior surfaces until they have completely cooled. Proper ventilation is essential to prevent fumes from causing discomfort. Never use abrasive cleaners or sharp objects that could damage surfaces and lead to accidental cuts. After the cycle‚ allow the oven to cool completely before wiping away ash. Always follow the manufacturer’s guidelines to ensure safety and avoid burns during the self-cleaning process.
Ensuring Proper Ventilation
Ensuring proper ventilation is essential when using the self-cleaning feature on your GE stove. The high-heat cycle produces strong fumes and odors from decomposing food residue. Open windows and doors to allow fresh air to circulate and prevent the buildup of fumes. Turn on your kitchen exhaust fan or range hood to help ventilate the area. Avoid using strong cleaning products or abrasive chemicals‚ as they can release harmful vapors when combined with heat. GE stoves are equipped with fans that help cool the oven and reduce fumes‚ but proper ventilation remains crucial for a safe and comfortable cleaning experience. Always prioritize good airflow to minimize odors and ensure the process is both effective and safe.
Handling Ash and Residue Safely
After the self-cleaning cycle‚ allow the oven to cool completely before handling any ash or residue. Use oven mitts or gloves to protect your hands from potential heat. A dust mask is recommended to avoid inhaling ash particles. Carefully scoop up the ash using a soft brush or a non-abrasive scraper‚ and collect it in a heat-resistant container. Avoid using wet cloths or water‚ as they can create a messy paste. Dispose of the ash and residue in a sealed bag or container to prevent dust dispersal. Never mix ash with other household waste‚ as it may contain hazardous materials. For additional safety‚ GE stoves are designed to simplify ash removal‚ but proper precautions ensure a safe and clean process. Always refer to your manual for specific guidance.
Maintenance and Care After Self-Cleaning
Regularly cleaning and inspecting your GE stove ensures optimal performance and longevity. Use a soft cloth and mild detergent to wipe surfaces‚ and replace worn-out parts promptly.
Regular Cleaning to Maintain Efficiency
Regular cleaning is essential to maintain your GE stove’s efficiency; After each use‚ wipe down surfaces with a soft cloth and mild detergent to prevent grease buildup. For minor spills‚ use the steam clean option by pouring one cup of water into the oven and selecting the Steam Clean feature. This loosens food residue at a lower temperature‚ making cleanup easier. Additionally‚ avoid using abrasive cleaners that can damage the finish or glass surfaces. Consistent maintenance ensures the self-cleaning feature works effectively and prolongs the appliance’s lifespan. Always refer to the owner’s manual for specific cleaning recommendations tailored to your model.
Inspecting and Replacing Oven Parts
Regular inspection of oven parts is crucial for maintaining performance and safety. After each self-cleaning cycle‚ check oven racks‚ gaskets‚ and door seals for signs of wear or damage. Racks exposed to high heat may warp or corrode‚ requiring replacement. Door gaskets should be inspected for tears or brittleness‚ as they ensure a proper seal during cleaning. If parts are damaged‚ replace them promptly to prevent heat leakage or reduced efficiency. For internal components like heating elements or fans‚ consult a qualified technician if repairs or replacements are needed. Always refer to the owner’s manual or GE Appliances’ official website for genuine replacement parts and guidelines to ensure compatibility and safety.
Troubleshooting Common Issues
If the self-clean mode malfunctions‚ turn off the oven and disconnect power. Check for error codes or unusual sounds. For unresolved issues‚ contact a qualified GE technician for professional servicing.
What to Do if the Self-Clean Mode Malfunctions
If the self-clean mode malfunctions‚ immediately turn off the oven and unplug it from the power source. Avoid attempting to repair the issue yourself‚ as high temperatures and electrical components can pose safety risks. Instead‚ contact a certified GE technician to diagnose and resolve the problem. Additionally‚ refer to the owner’s manual for specific troubleshooting steps tailored to your model. Never bypass safety features or continue using the oven if it’s not functioning correctly‚ as this could lead to further damage or safety hazards.